How To - Manage Capacity Tab - Adding Plans
Applying plans in the booking system is the final step to ensure the correct time slots, layouts, and capacity settings are used for each day.
-
Go to the Managed Capacity section and select the Standard Day view.
-
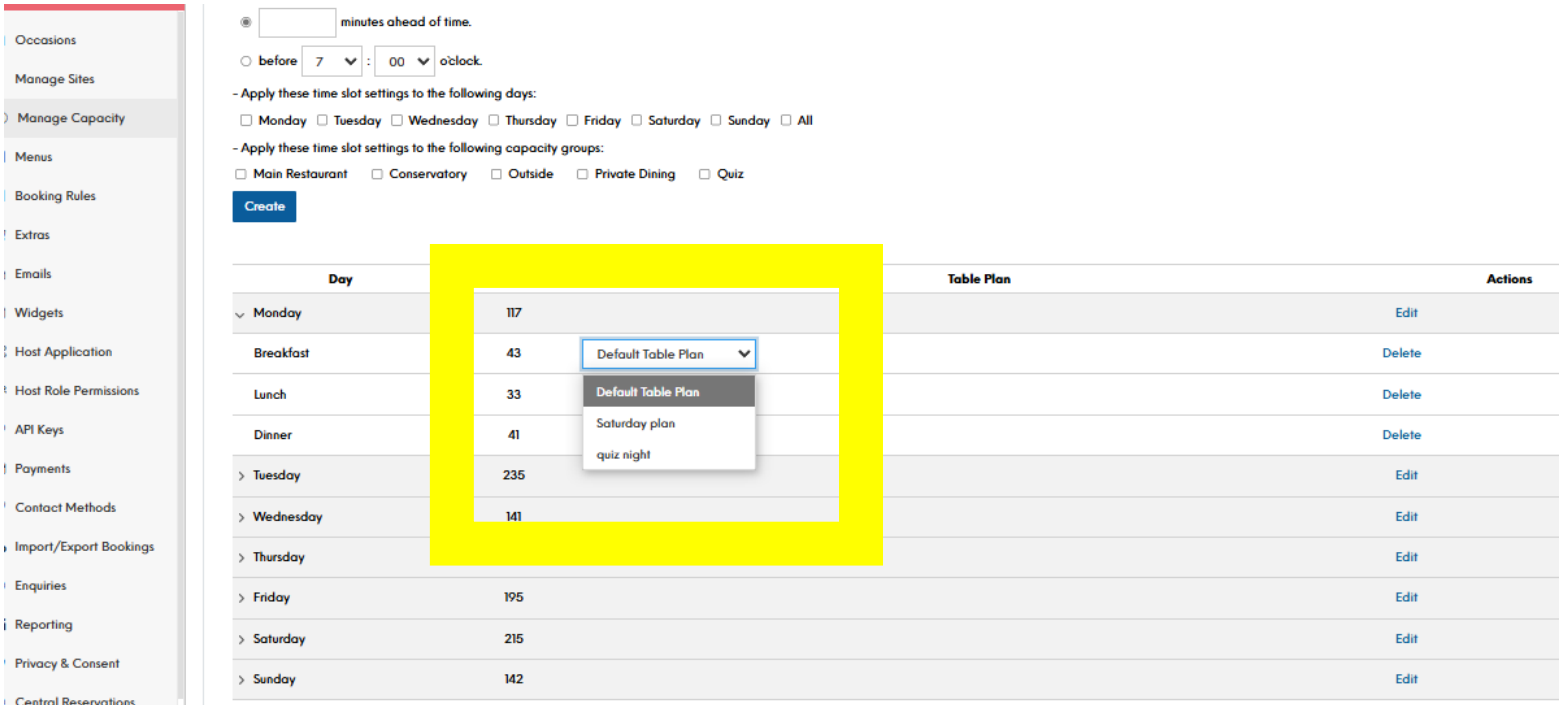
You'll see a list of the days of the week, with the current day's date highlighted.
-
For each day, you'll see a Table Plan dropdown in the right-hand column.
-
Click on the Table Plan dropdown and select the layout you want to apply for that day.
For example:
-
On a regular weekday, you might select the "Default Layout"
-
On a weekend, you might select the "Weekend Layout"
-
For a special event day, you might select a custom "Event Layout"
-
-
Once you've selected the appropriate layout for each day, scroll to the bottom and click Save
This will apply the selected layouts to the corresponding time slots and occasions.
Now, when customers go to book, they will see the table and seating options based on the active layout for that day.
You can also apply special day plans in a similar way:
-
Go to the Special Days section and create or edit a special day.
-
In the special day settings, you can choose to Disable All Bookings for that day.
-
Alternatively, you can configure custom time slots and capacity limits for the special day.
-
These special day settings will then override the standard time slots when that date arrives.
Applying the right plans ensures your booking system accurately reflects your venue's operational needs and availability for each day or special occasion.
This helps provide customers with a seamless and transparent booking experience, while also optimising your table utilisation and capacity management.